When working on a short film which needed some large scale, art direct-able storm cloud vortex elements, I began looking around for previous examples of similar effects and different techniques and approaches for this sort of thing.
It was while looking for these I stumbled across a fantastic tutorial by John Kunz, showing off a workflow for turning an animated character into a cloud, which seems simple enough, until you remember that noise patterns and animated geometry are not going to work together right out of the box. In Houdini, if you take a piece of geometry, animate it and apply the cloud and cloud noise nodes to it, you’ll see the geometry “swimming” through the noise pattern, as the noise has no way of knowing about how the geometry moves, it is simply applying the same 3D noise pattern to the volume on every frame.
This is a problem with 2D noise patterns applied to deforming objects as textures also, and the solution is usually to either use the UV texture coordinates of the object or Pref coordinate space, which references a rest pose/object, to drive the noise pattern.
When working with 3D noises applied to volumes, using a rest attribute/field in a similar way to the UV coordinate solution to drive the noise can work to some degree, but a rest attribute only stores the position of the points on the surface, projecting these from the surface into 3D space, and can’t fully describe extreme and complex changes in shape, i.e twisting, bending, scaling etc. To capture accurate 3D deformations requires the creation of a local object space, using matrices to describe the change in position from an initial state, which is what John sets up and demonstrates in his brilliant tutorial which I highly recommend over my quick and dirty explanation:
My tool simply takes John’s clever setup and packages it into an easy to use tool, which takes a volume as the first input, the deforming geometry as the second, and an initial pose or static geometry as the third. One addition is a control to blend between using world space (the default) and the custom local object space to drive the noise, which can create some interesting effects and give a more evolving “cloudy” look.
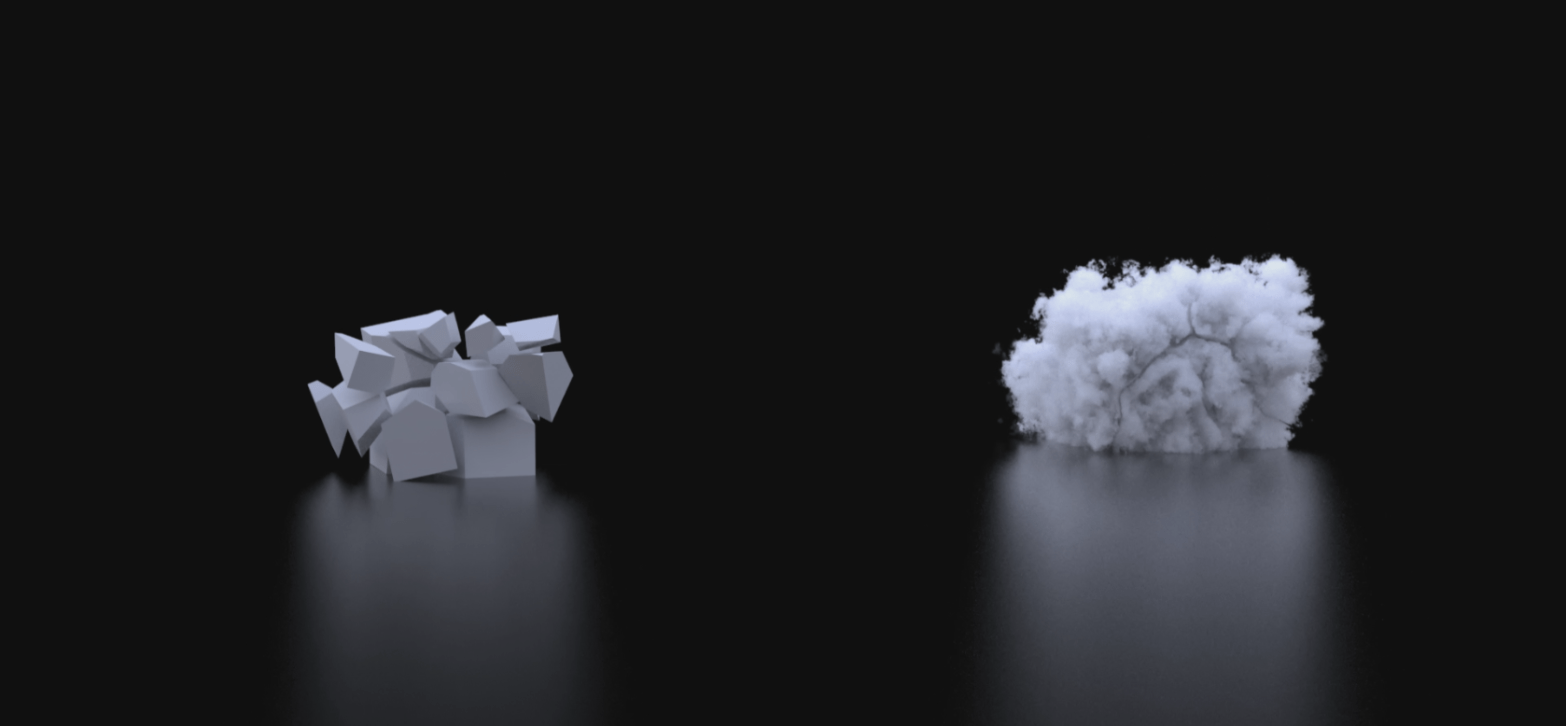
Here are some quick demos to show the tool in action:
I highly recommend giving John Kunz’s YouTube channel a look as it is loaded with high quality tutorials and demos for Houdini. You can also catch his streams live on Twitch.
Noise Controls
| Noise | Duplicated controls from the default cloud noise – see https://www.sidefx.com/docs/houdini/nodes/sop/cloudnoise.html |
| Advection | Duplicated controls from the default cloud noise – see https://www.sidefx.com/docs/houdini/nodes/sop/cloudnoise.html |
| Noise Mask | Duplicated controls from the default cloud noise – see https://www.sidefx.com/docs/houdini/nodes/sop/cloudnoise.html |
| Local/World Space Bias | A bias control to blend between using the custom local object transform space or traditional world space. Set to 0 to fully follow the local object deformation Set to 1 to use world space (identical to default cloud noise node) Choosing a value between 0 and 1 will create a blend of the two spaces which can create an evolving ‘cloudy’ look |
Inputs
Volume
The input fog volume to apply the cloud noise to. Should be created from the animated geometry, most easily using the cloud node
Deforming Geometry
The animated/deforming geometry used to create the animated volume. Must have matching topology to the static source geomtry.
Rest Geometry
The initial static geometry used to define the rest position for the local object space.
Outputs
Volume
The input animated fog volume, with cloud noise applied
Transform Matrix
The generated matrix transform which describes the difference between the static and animated geometry. Can be used for additional applications needing the local object space, visualisation and debugging.
